

Brewing equipment is the heart and soul of every brewery, turning raw grains and hops into the liquid gold beer enthusiasts crave. When you invest in the right brewing equipment, you’re not just buying metal and valves—you’re unlocking the power to craft unforgettable beers, delight your customers, and scale your operation. In this high-voltage guide, we’ll dive deep into brewing equipment—from mash tuns to fermenters—to reveal why choosing the best gear matters, answer the questions you’re dying to ask, and introduce you to SKE Equipment’s top-tier solutions. Ready to see how the right brewing equipment can skyrocket your brewery’s success? Let’s dive in.
1. Why Brewing Equipment Matters
Every brewer remembers their first glorious sip of a flawless stout or a perfectly balanced IPA—and the crushing frustration of a batch gone wrong. Inconsistent temperatures, clogged valves, or faulty gauges can turn your dream into a nightmare. That’s where brewing equipment comes in. It’s not just machinery; it’s the foundation of your craft.
Picture Chloe, a homebrewer turned microbrewmaster. She spent months perfecting her recipe, only to find that her old kettle and makeshift fermenter delivered uneven results. Hops would sediment unpredictably; yeast flocculation varied, and her friends’ compliments turned into polite nods. All that changed when she upgraded to professional-grade brewing equipment from SKE Equipment. Suddenly, her brew days were smooth, her fermentations predictable, and her taproom fans couldn’t get enough. That’s the transformative power of the right brewing equipment.
2. Core Components of Brewing Equipment
Before exploring the advantages, let’s break down the essential pieces of brewing equipment that every brewery—large or small—needs:
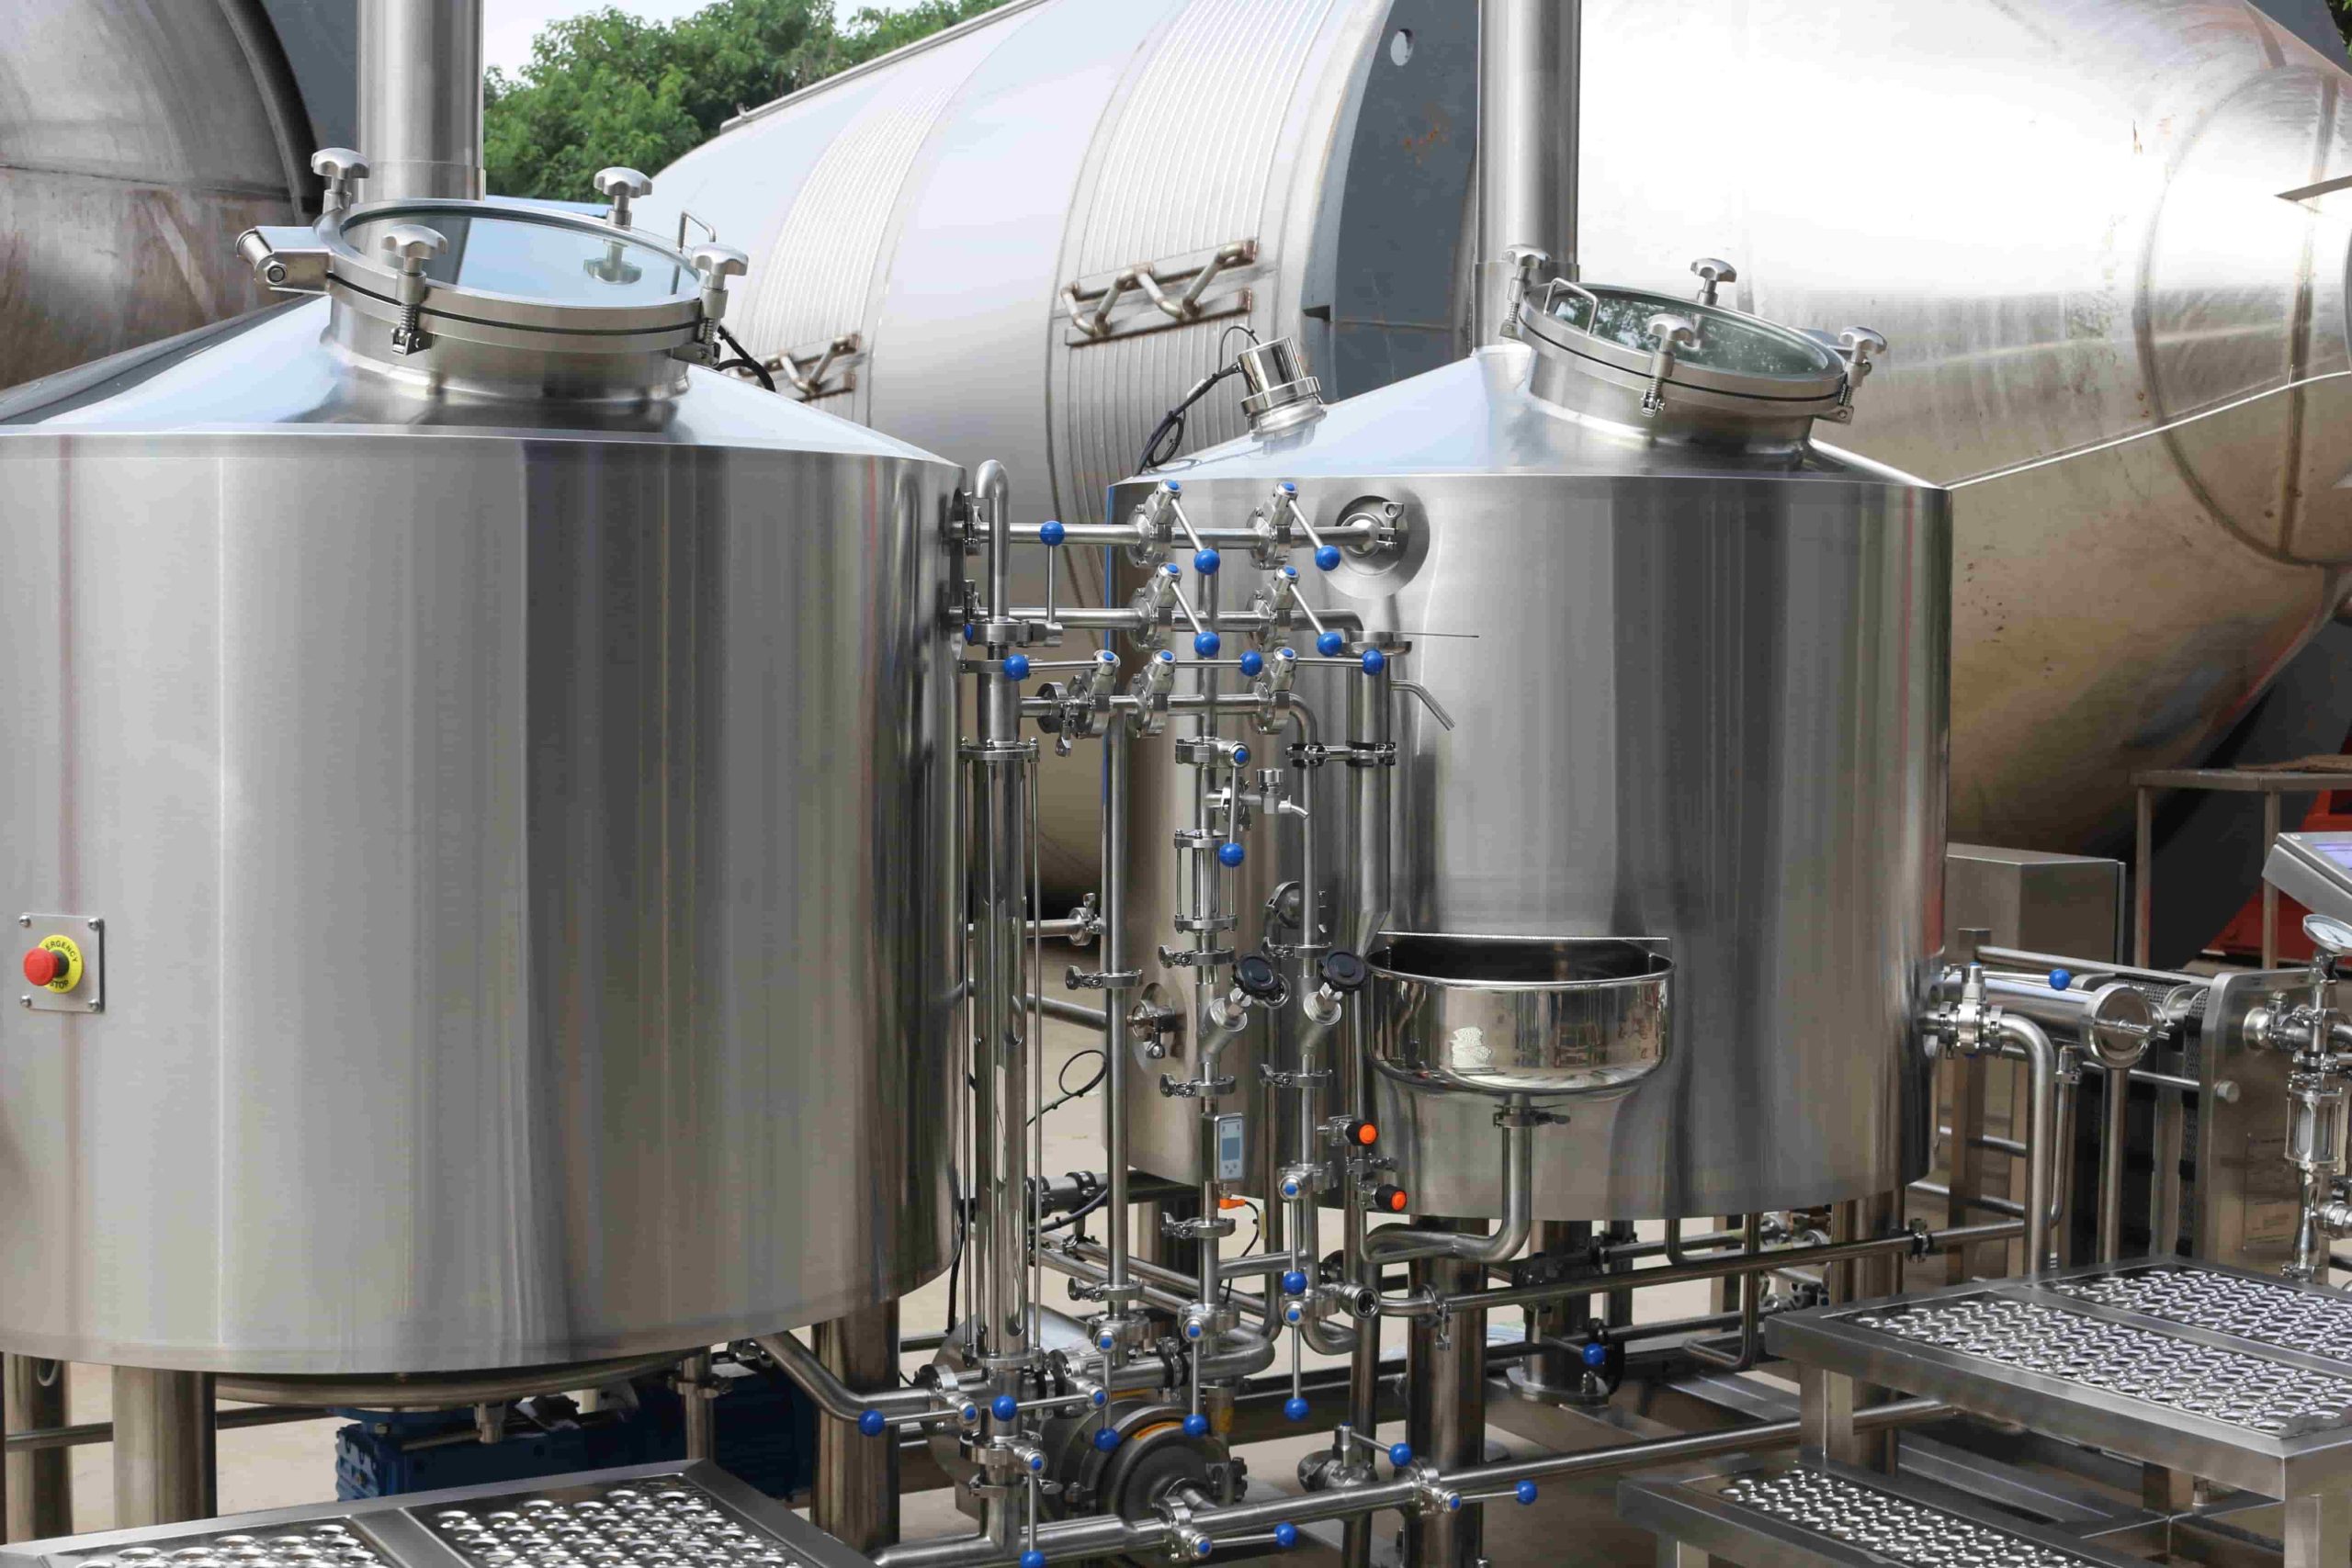
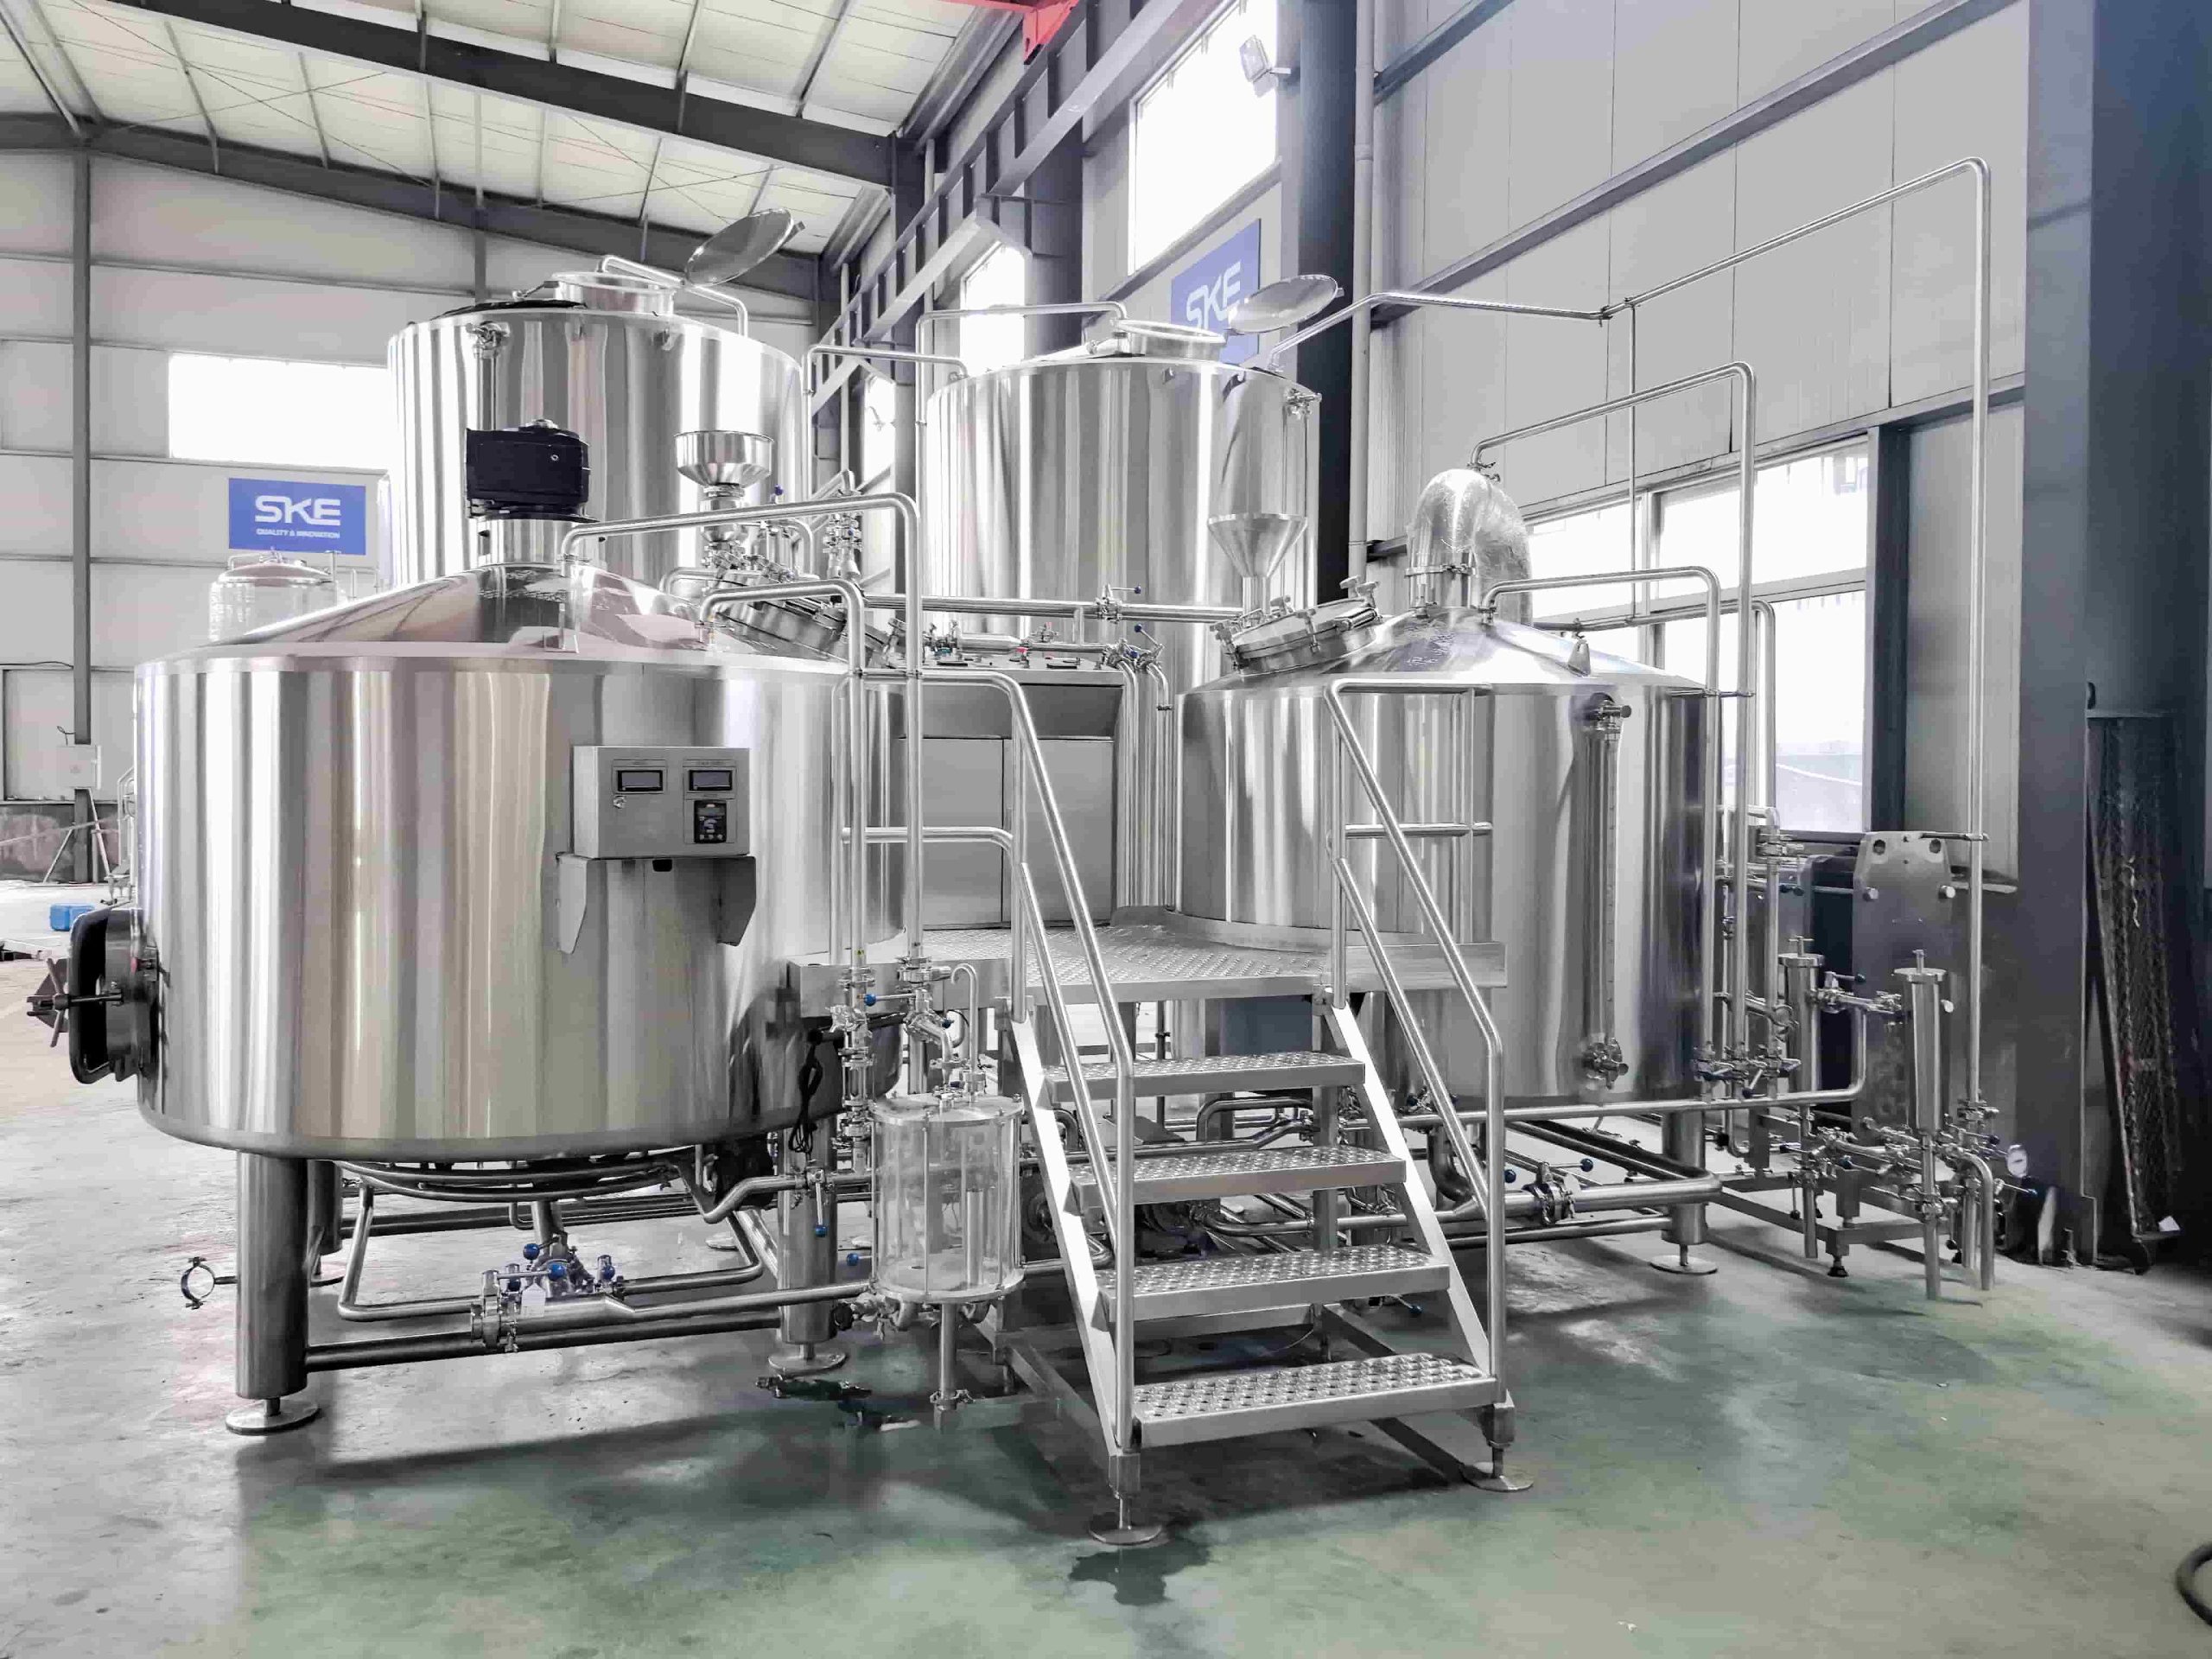
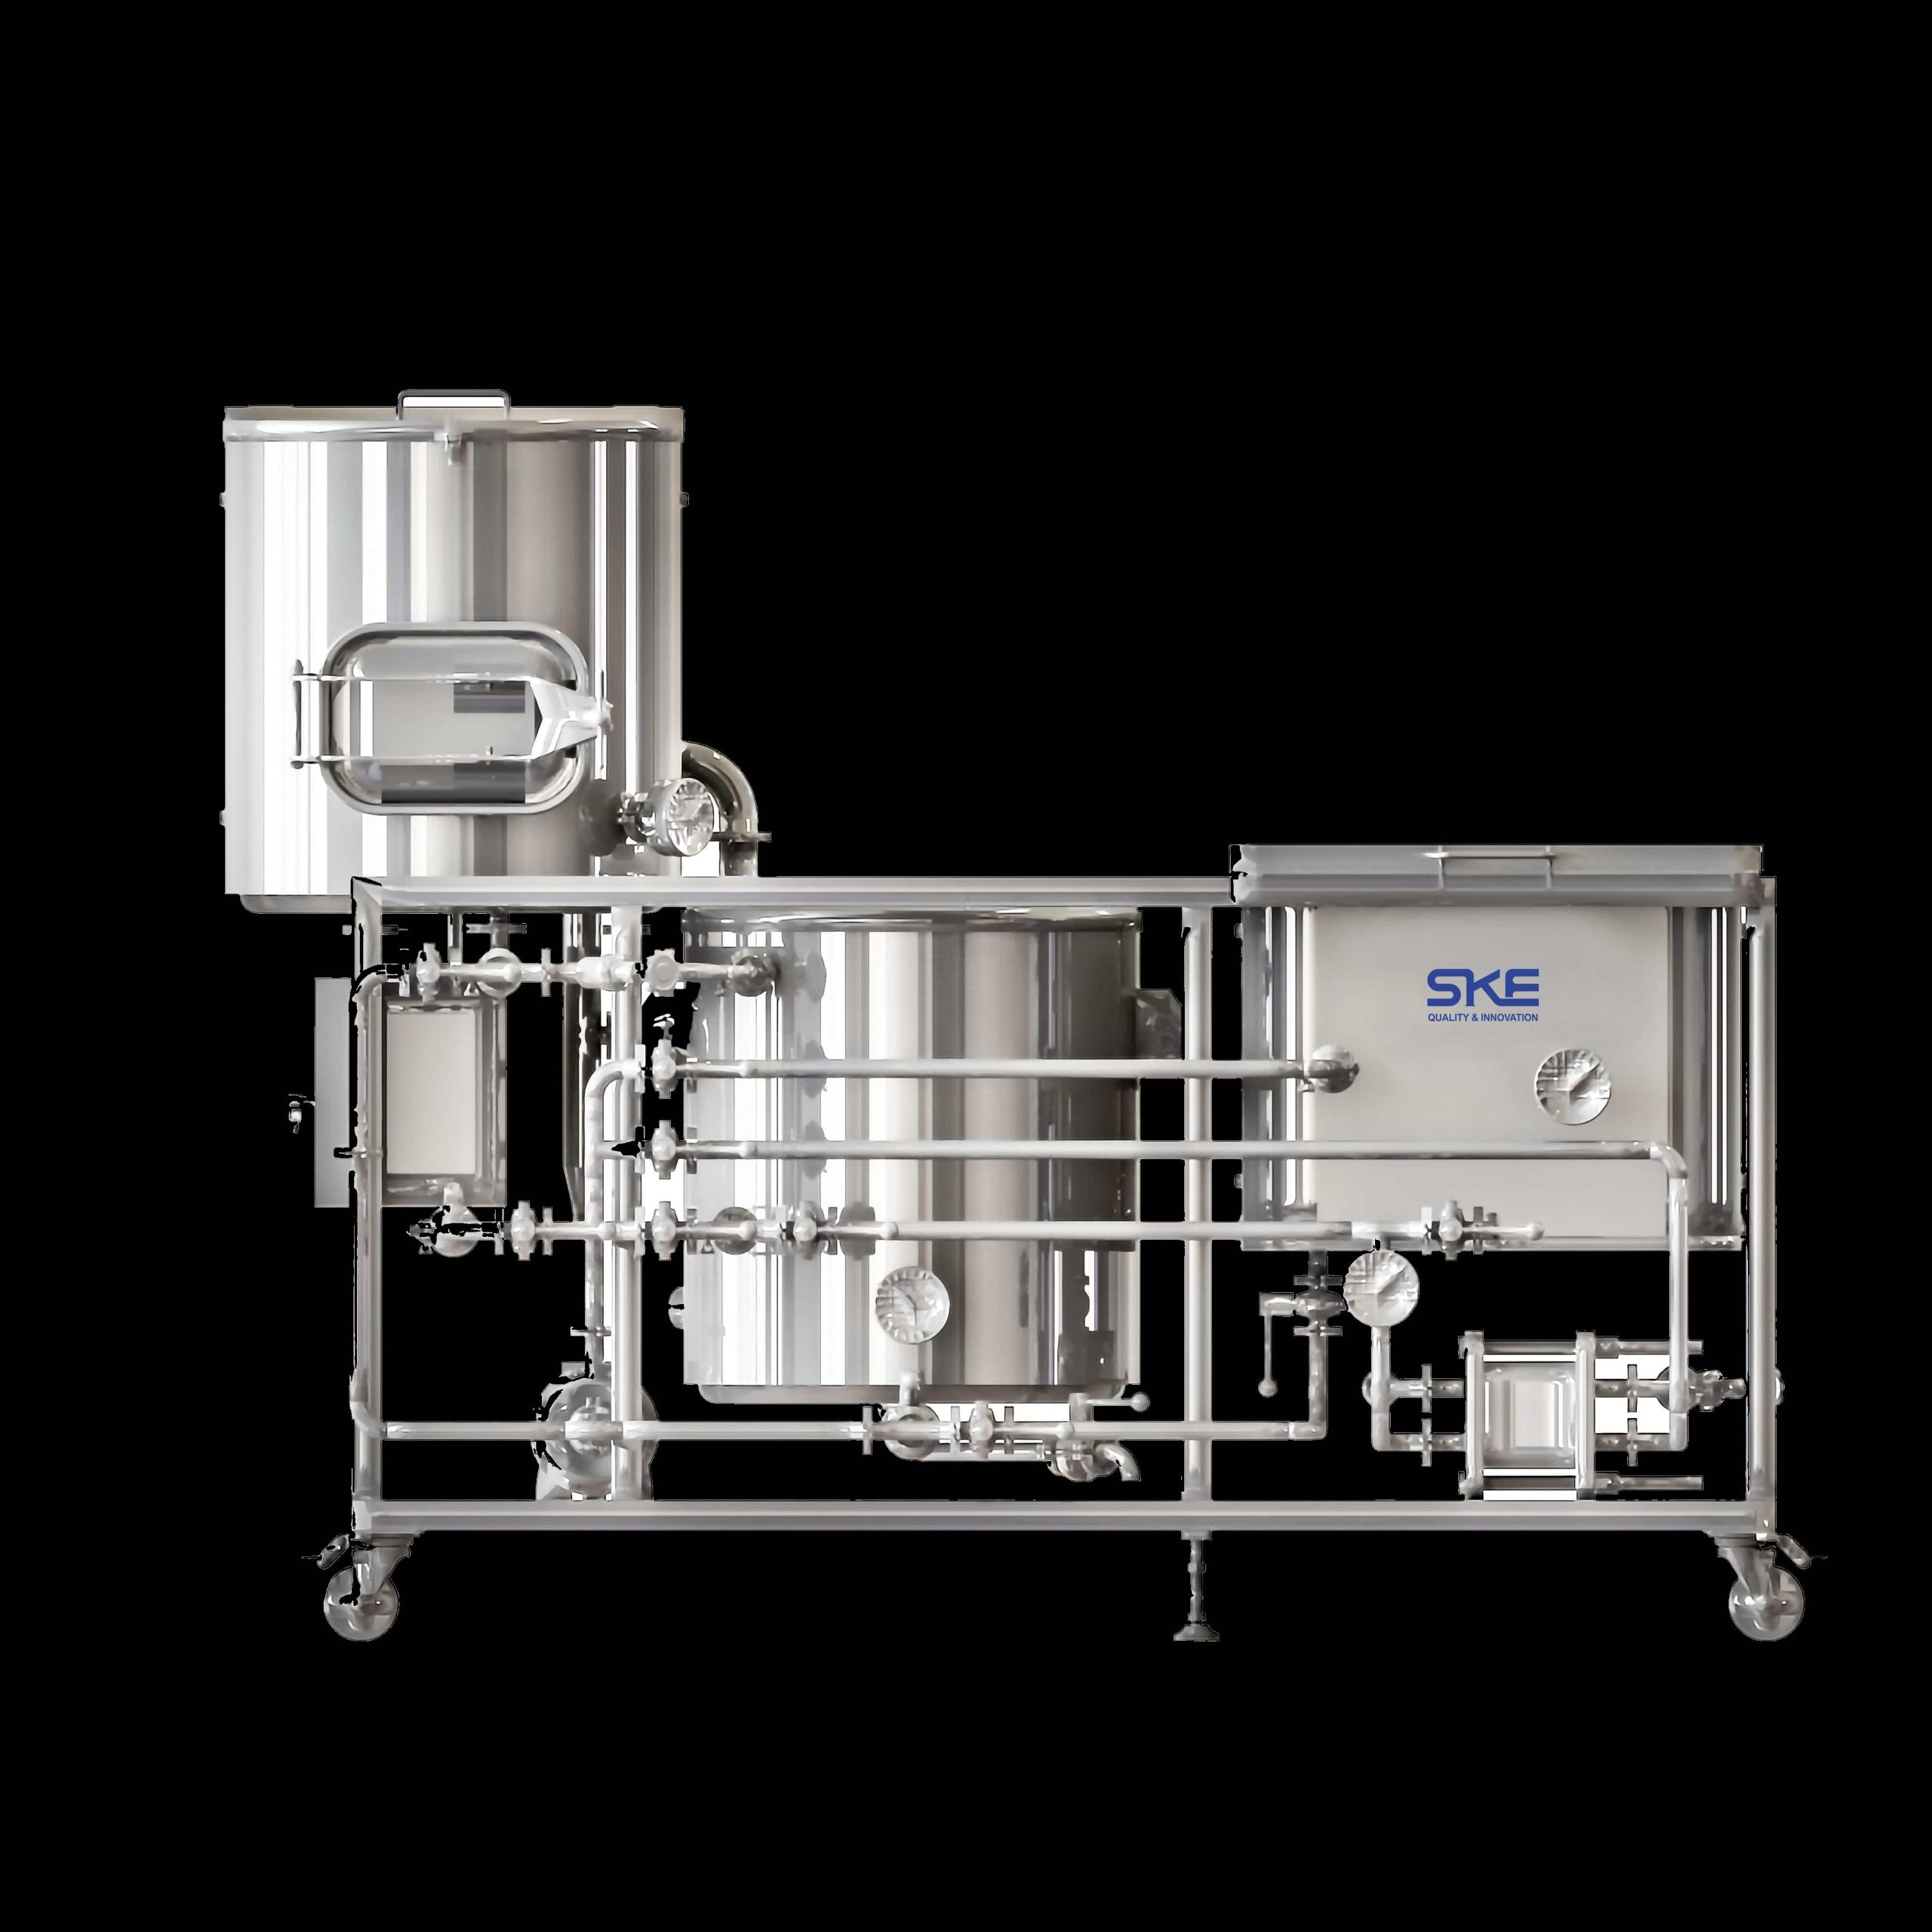
Mash Tun
The vessel where crushed grains meet hot water. A premium mash tun, like SKE Equipment’s insulated stainless-steel model, ensures even temperature distribution (±1 °C) and maximizes starch conversion.
Lauter Tun (or Mash/Lauter Combo)
Responsible for separating wort from spent grains. Efficient lautering requires precise rakes or specialty false bottoms. SKE Equipment’s lauter tuns feature adjustable rakes and high-flow manifolds to prevent stuck sparges.
Brew Kettle (Boil Kettle)
Where wort boils and hops impart bitterness, aroma, and flavor. Look for kettles with interpolation welds, high-watt heating elements, or steam jackets for rapid, consistent boils. SKE Equipment kettles boast patented corrugated steam jackets for 20% faster heat-up.
Whirlpool/Clarifier
After the boil, a whirlpool tank helps separate trub from clear wort by creating a centrifugal force. SKE Equipment’s whirlpool vessels come with vortex-inducing inlet designs, ensuring cleaner wort in less time.
Heat Exchanger
Critical for rapidly chilling hot wort to yeast-pitching temperature. Plate-and-frame or shell-and-tube designs must be robust and easily dismantled for cleaning. SKE Equipment offers double-walled stainless steel heat exchangers that handle 10 m³/h without clogging.
Fermenter
The workhorse where yeast converts sugars to alcohol. Fermenters must provide precise temperature control (±0.5 °C), pressure relief, and sanitary fittings. SKE Equipment’s fermenters feature double-jacketed walls for glycol cooling and self-insulating panels for energy savings.
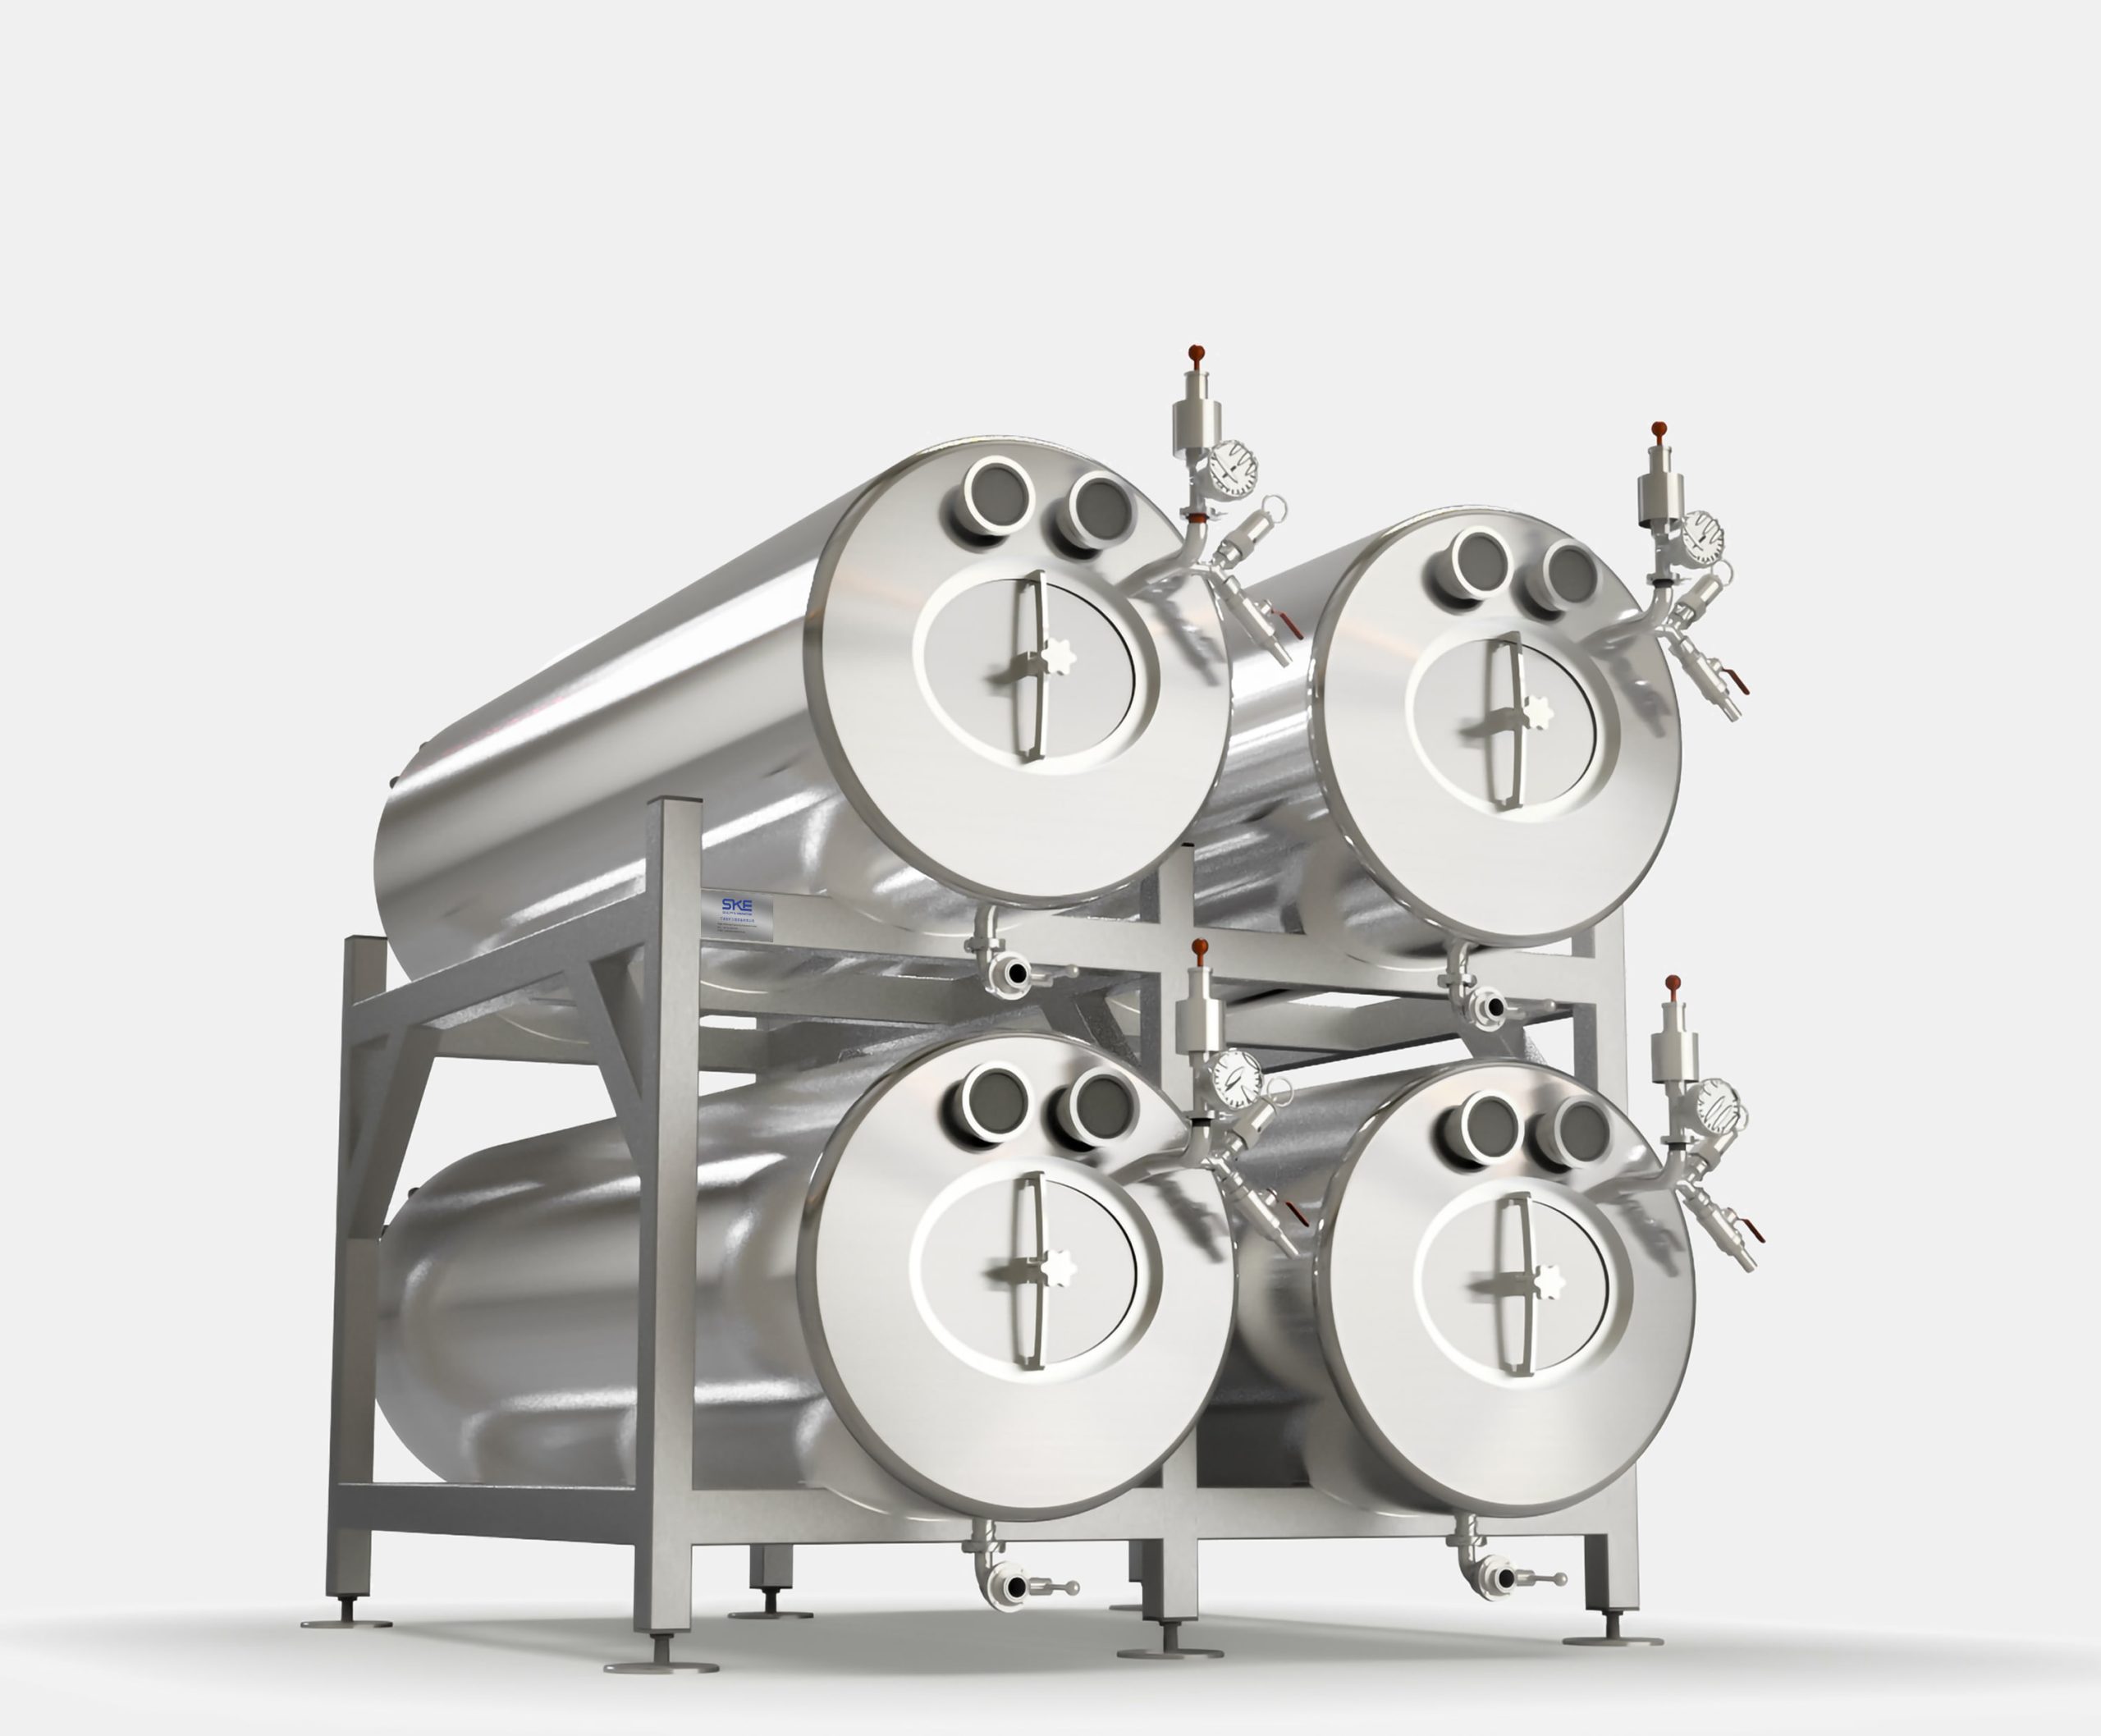
Bright Beer Tank
For maturation, carbonation, and clarification. Look for bright tanks with adjustable carbonation stones and pressure profiling. SKE Equipment’s bright tanks have built-in CO₂ diffusers and tri-clamp sampling ports to streamline quality checks.
CIP (Clean-In-Place) Unit
Ensures every vessel is sanitized between batches with minimal labor. Automated CIP systems from SKE Equipment deliver precise chemical dosing, hot-water recirculation, and validation reporting—reducing cleaning time by up to 50%.
Ancillary Gear
Grain mills, hop dosing machines, control panels, pumps, and piping networks. SKE Equipment integrates all these with hygienic Tri-Clamp fittings and sanitary design to eliminate contamination risks.
Every element of brewing equipment matters, and each component must work in harmony. When one piece falters, the entire system suffers. That’s why selecting high-quality brewing equipment, like what SKE Equipment offers, is the surefire path to consistent, award-winning beer.
3. Key Advantages of Professional Brewing Equipment
Investing in top-tier brewing equipment delivers tangible benefits that ripple across your entire operation:
Consistent Beer Quality
– Precise temperature control during mashing and fermentation prevents off-flavors. With SKE Equipment’s PID-controlled fermenters, you lock in your target profile—batch after batch—so your stout always tastes like your stout.Increased Throughput
– Faster heat-up and cool-down times (20–30% improvement) mean you can run more cycles per week. SKE Equipment’s corrugated kettle jackets and high-efficiency heat exchangers shave hours off your brew schedule.Reduced Labor & Simplified SOPs
– Automated CIP, integrated balancing valves, and user-friendly HMIs free your staff from manual scrubbing and guesswork. SKE Equipment’s CIP units come with pre-programmed recipes, so a single tap on the touchscreen handles caustic, acid, and sanitizing rinses.Energy Savings & Sustainability
– Insulated vessels, heat recovery loops, and efficient glycol loops cut utility bills by up to 25%. When you choose brewing equipment with steam-jacketed kettles or plate-type coolers, you’re also making a greener choice—reducing your brewery’s carbon footprint.Scalability & Flexibility
– Modular designs let you start with a 1 000 L pilot system and expand to 10 000 L production by adding extra vessels. SKE Equipment’s modular frames and standardized fittings mean you can scale without re-engineering your entire layout.Enhanced Sanitation & Safety
– Seamless welds, 316L stainless steel, and Tri-Clamp fittings minimize microbial traps. Automated CIP ensures sterilization, and pressure relief valves keep everything operating safely under pressure. SKE Equipment surpasses 3A sanitary standards, giving you peace of mind.Improved Yield & Reduced Waste
– Precise wort separation and efficient transfer pumps cut trub carryover. Every drop of precious wort ends up in your fermenter, not down the drain. Breweries using SKE Equipment report up to a 5% increase in extract efficiency.
4. Equipment Installation & Commissioning
Even the best brewing equipment can underperform if poorly installed. Follow these steps to ensure a flawless launch:
4.1 Site Preparation
Floor Rating: Verify that your concrete slab can support the combined weight of vessels, liquid, and ancillary gear—especially when full. A 5 000 L fermenter can weigh over 6 000 kg when full.
Utilities Layout: Pre-run steam, glycol, electricity, and water lines within 1.5 m of each vessel location. Designate drain points for CIP wastewater, ensuring proper slope to floor drains.
Clearances & Access: Maintain at least 1 m of clearance around each unit for maintenance. Provide 2 m overhead clearance for removing manway covers and agitator heads.
4.2 Mechanical Installation
Leveling & Anchoring: Set vessels on vibration-dampening pads or grout to level. Anchor legs or skirt bases with seismic-rated bolts if local code requires.
Interconnecting Piping: Use sanitary Tri-Clamp connections for easy disassembly. Install balancing valves, check valves, and pressure gauges for precise flow control.
Agitator & Motor Mounting: Align shaft and motor to within ±0.5 mm for smooth operation. Torque motor mount bolts per manufacturer specs to extend seal life.
4.3 Instrumentation & Electrical Hookup
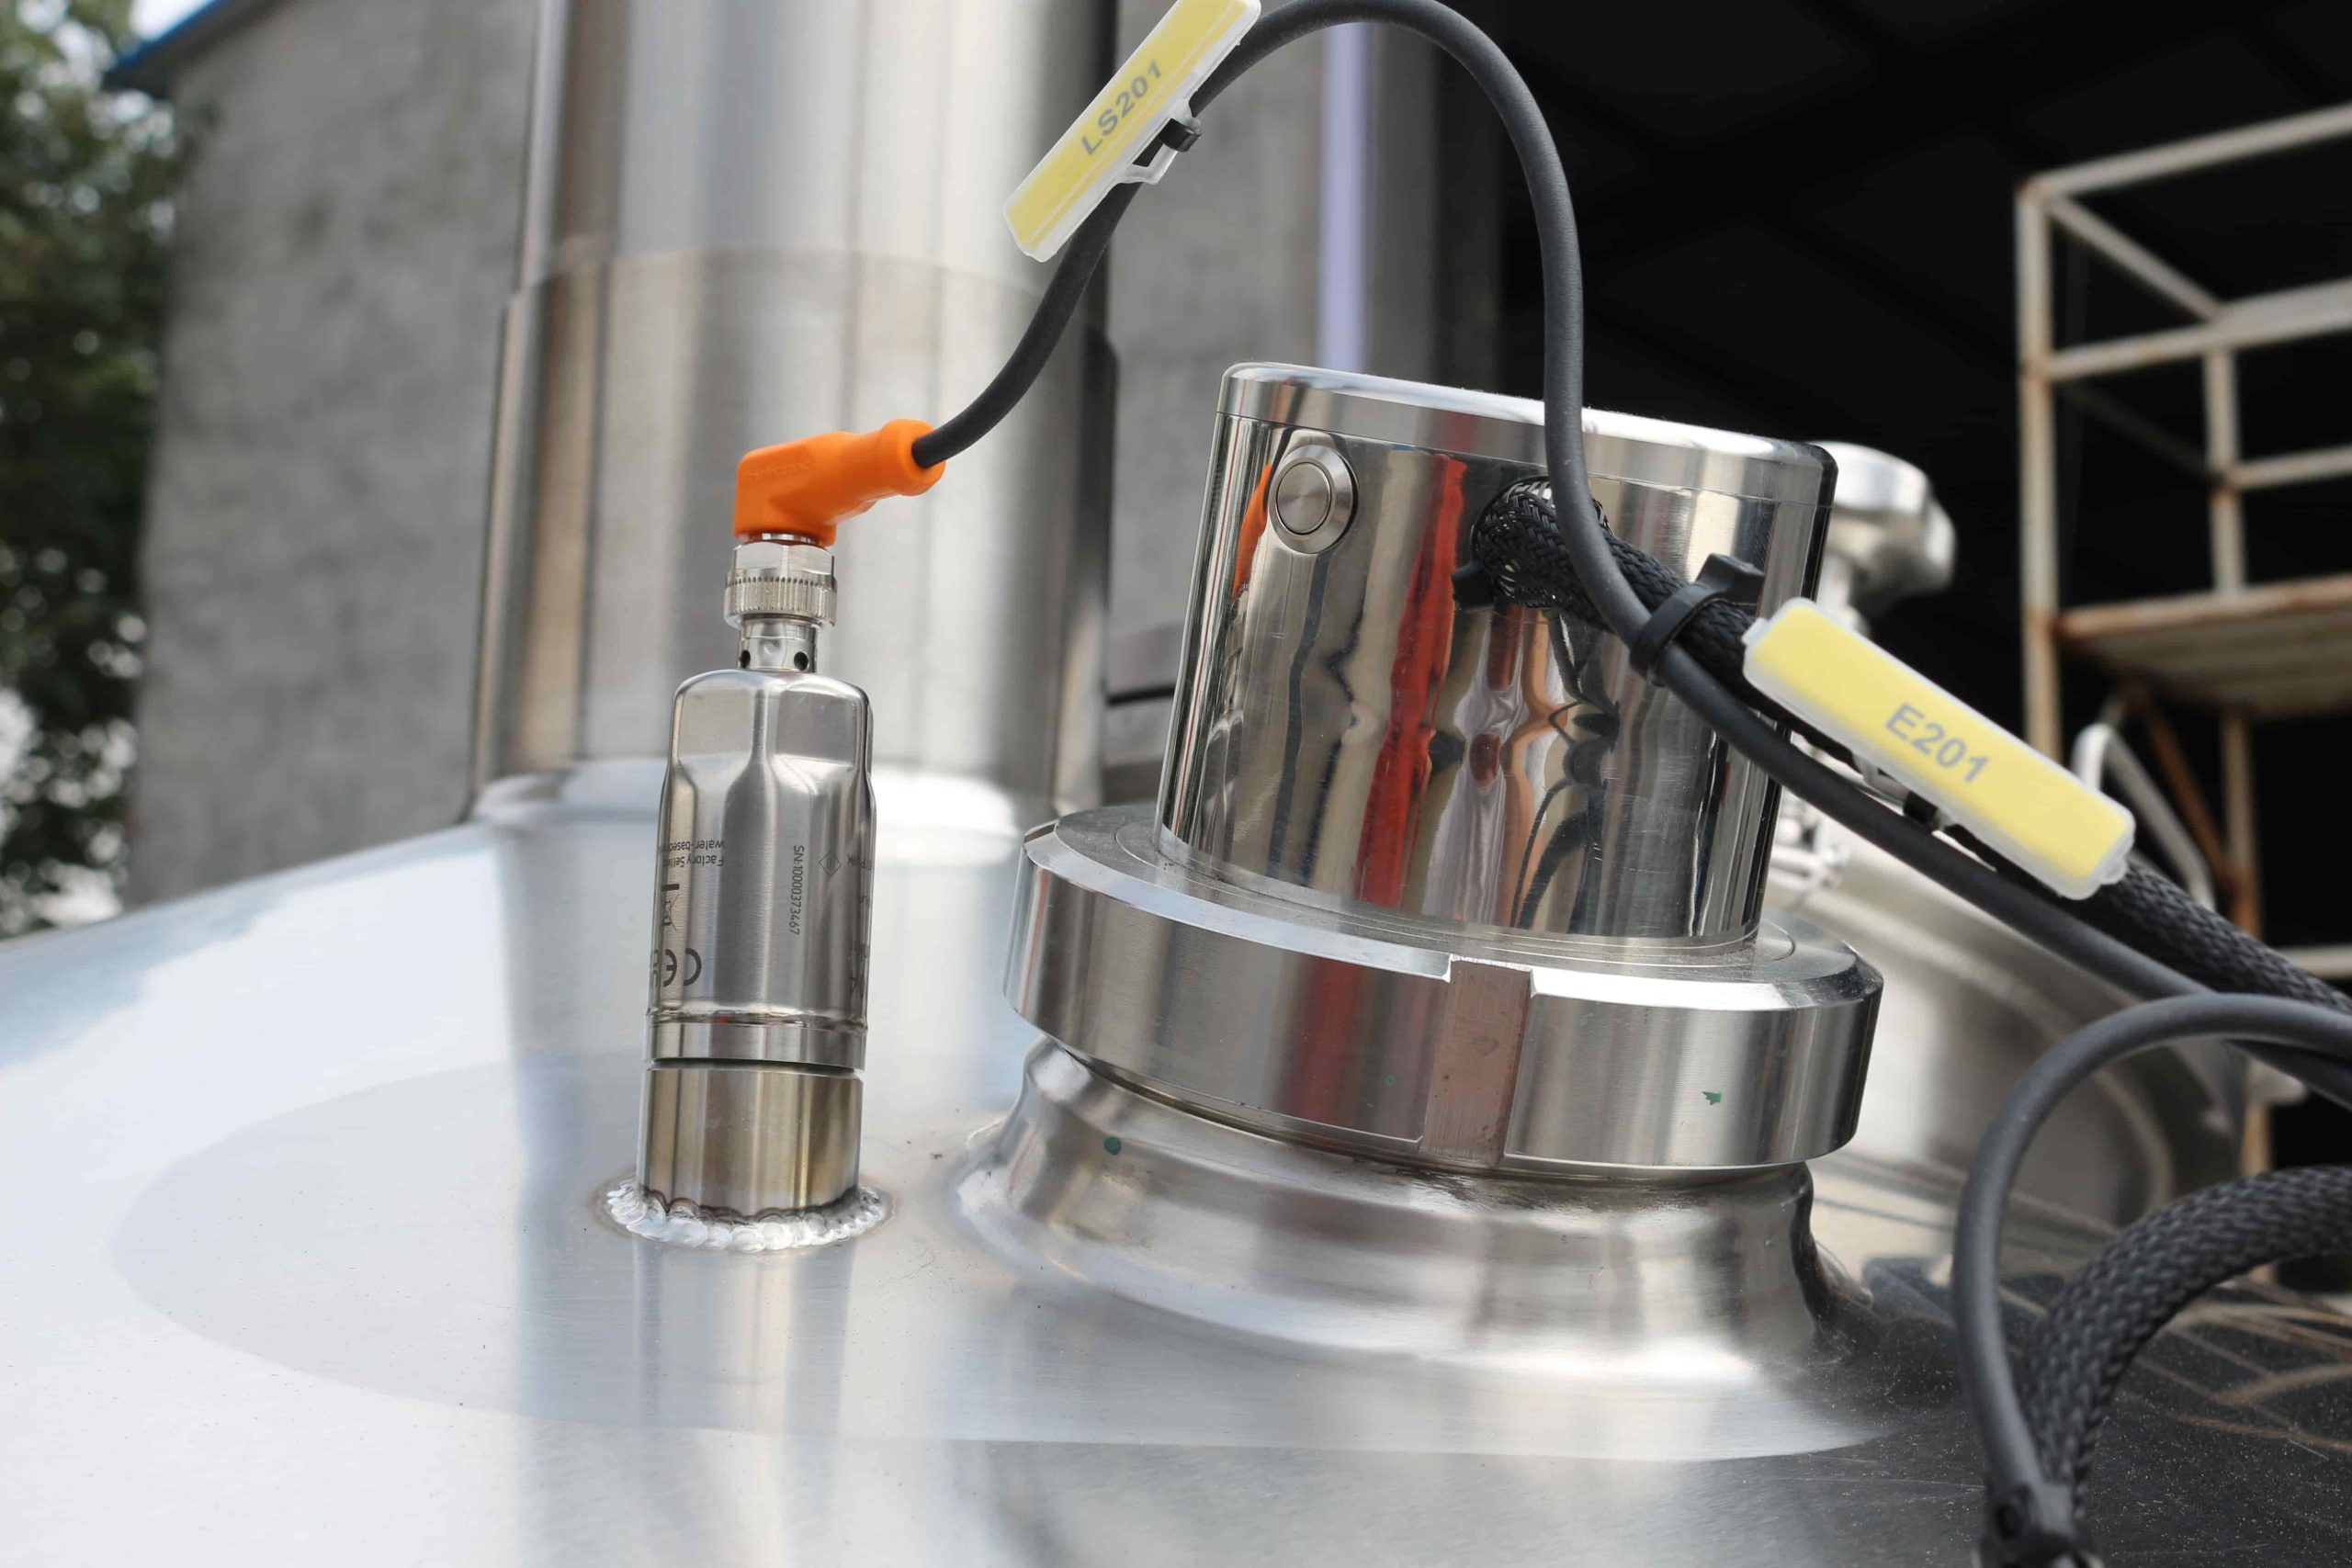
Sensor Placement: Install RTDs or thermocouples in thermowells at key points—mash tun bottom, kettle dome, fermenter α-tank. Ensure cables are routed away from heat sources.
PLC & HMI Programming: Configure PID loops for temperature setpoints, pressure alarms, and CIP recipes. Set user privileges—operators get brewing controls, supervisors access system parameters.
Validation & Calibration: Run dry tests to verify heater and cooler ramp rates. Calibrate sensors at 20 °C, 60 °C, and 100 °C. Pressure-test steam jackets to 1.5× design pressure for safety certification.
4.4 First Batch Commissioning
Water-Only Run: Fill vessels with water, circulate a full CIP cycle, and confirm flow rates (≥1 m/s) and drain times. Check for leaks in every gasket and valve.
Thermal Cycle Test: Heat mash tun to 65 °C, hold 30 min, then cool to 20 °C to validate heat transfer. Do the same for fermenter cooling—chill to 18 °C within the specified timeframe.
Operator Training: Walk through HMI menus, alarm procedures, and emergency shutdown. Provide documentation—P&ID, electrical schematics, CIP recipes, and a preventive maintenance schedule.
Once commissioned, your brewing equipment is ready to produce consistent, high-quality beer from day one.
5. Operation & Maintenance Best Practices
To get the most from your brewing equipment, follow these guidelines:
5.1 Daily Pre-Run Checks
Visual Inspection: Examine vessels for dents, leaks, or frost buildup on glycol lines. Check valve positions and confirm sight glasses are clear.
Sensor Verification: Compare digital readings with handheld probes at two reference points. Adjust zero offsets if discrepancies exceed 1 °C.
Valve Positioning: Ensure inlet, outlet, and recirculation valves are set according to the brewing recipe—steam on for mash, glycol on for fermentation.
5.2 Standard Brewing Cycle
Mashing: Heat mash tun to 65 °C using a brewing equipment’s steam jacket. Recirculate mash three times per minute to maintain a uniform temperature.
Sparging: Transfer wort through the lauter tun while maintaining a steady flow of 1 m/s.
Boiling: Engage steam jacket to reach 100 °C within 30 minutes. Add hops in timed additions—first wort hops at 60 min, aroma hops at 5 min.
Whirlpool Separation: Transfer wort to whirlpool tank; engage centrifugal inlet to collect clean wort at center.
Cooling: Route wort through a plate heat exchanger to chill to 18 °C, then pump into the fermenter.
Fermentation: Circulate glycol through the fermenter jacket to hold 18 °C for 7 days, then drop to 4 °C for cold crash.
CIP: After emptying, refill fermenter with water, run automated CIP (2% caustic at 75 °C → rinse → 1% acid at 60 °C → rinse) in 90 minutes.
5.3 Cleaning & Sanitation
Frequency: Daily CIP for vessels used with high-gravity worts (OG ≥ 1.060). For lighter worts (OG ≤ 1.050), CIP every 48 hours may suffice.
Automated CIP Recipes: SKE Equipment’s CIP panels adjust chemical concentration based on cycle history—ensuring optimum cleaning without chemical waste.
Manual Inspection: Monthly, open manways and inspect interior welds, spray-ball coverage, and gasket condition. Use a borescope to check jacket interior for scale or corrosion.
5.4 Preventive Maintenance
Monthly: Check agitator mechanical seals for leaks—replace if leakage > 10 mL/day. Inspect Tri-Clamp fittings and tighten per torque specs.
Quarterly: Drain and flush heat exchanger loops to remove scale. Pressure-test steam jackets to 1.5× design pressure (e.g., 12 bar for an 8 bar design).
Semi-Annual: Re-calibrate all temperature sensors and pressure gauges. Verify CIP pump performance—flow rates should be ≥ 1 m/s.
Annual: Replace thermowell O-rings and recirculation pump seals. Re-inspect insulation for moisture ingress—dry out or replace as needed.
5.5 Troubleshooting Tips
Inconsistent Mash Temperatures: Check for air pockets in steam lines—bleed steam traps. Verify mash tun insulation is intact.
Slow Cooling Rates: Ensure glycol chiller is sized correctly for the vessel volume (e.g., 1 kW per 100 L). Bleed air from jacket lines using vent valves.
Clogged Heat Exchanger: Backflush with 1 bar of water daily after brew. Use acid descaling solution monthly to dissolve mineral deposits.
6. Customer FAQs: Brewing Equipment Insights
Q1: What capacity brewing equipment do I need for my startup brewery?
A1: Start by estimating your desired annual production (e.g., 5 000 L/year). A 1 000 L brewhouse allows you to scale gradually. If you’re targeting 50 000 L/year, consider a 5 000 L brewhouse. SKE Equipment’s modular systems let you expand from 1 000 L to 3 000 L by adding kettles and fermenters without a full overhaul.
Q2: Is steam or electric heating better for brewing equipment?
A2:
Steam Heating: Offers rapid, uniform heat—ideal for mashing and boiling. Requires a reliable boiler and steam traps to avoid condensate issues.
Electric Heating: Easier to install and cheaper upfront for small systems (< 500 L). For larger volumes, steam is typically more efficient and cost-effective over time.
Q3: How do I choose between open and closed fermenters?
A3:
Open Fermenters: Provide direct yeast access and easy cleaning but increase contamination risk.
Closed (Unitank) Fermenters: Maintain CO₂ blanket, allow pressure fermentation, and simplify carbonation. For hygienic operation and consistent flavor, many brewers prefer closed fermenters like those in SKE Equipment’s lineup.
Q4: What’s the ROI timeline on investing in professional brewing equipment?
A4: Most breweries recoup their brewing equipment investment in 12–18 months through higher throughput, lower product loss, and energy savings (20–25% on utilities). Automated CIP and consistent yields mean fewer wasted batches—accelerating payback.
Q5: How do I maintain yeast health with my brewing equipment?
A5: Maintain precise mash and fermentation temperatures (±0.5 °C) with PID controllers. Ensure vessels are sanitized (CIP daily), use quality wort aeration equipment, and pitch healthy yeast at the correct pitching rate (1 million cells/mL/°P). Proper brewing equipment like SKE Equipment’s oxygenation stones and closed fermenters help protect yeast viability.